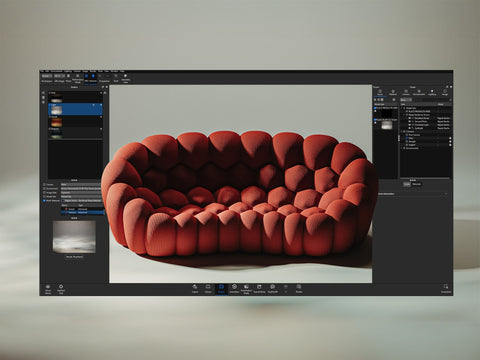
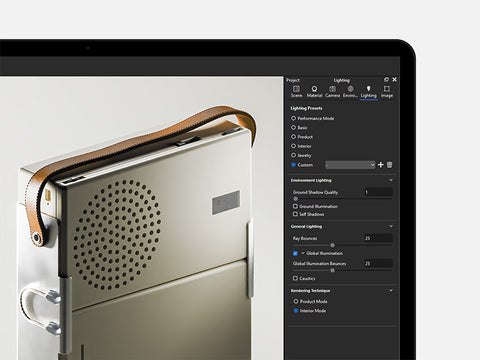
For years, our default render settings in KeyShot have remained the same. Any landscape render we produce, both for clients and our resources, has always been rendered at 3840 x 2880 @ 1000 - 2000 samples. With 3 x RTX 3090s on our render server, render times have never really been an issue for us. But with the latest improvements to Denoise and image sampling, we thought it was worth a deeper dive into our settings.
We ran a set of benchmark tests focused on real-world render times and visual fidelity. Our goal was to answer five practical questions with the hope of identifying how many samples you actually need when rendering in KeyShot.
To preface our findings, it’s important to outline that we always use Denoise with Denoise Blend at 1 (the maximum) in our renders. Every render, still or video, you see on our website and social media is rendered that way.
KeyShot 2024.3 saw the introduction of Progressive Denoising, which automatically adjusts the level of Denoise Blend on a pixel-by-pixel basis. As such, we have tested both KeyShot 2023 with the old Denoise and KeyShot 2025 with the updated one for a comprehensive comparison.
Here’s what we found:
1. How has render time changed across KeyShot versions?
We ran a consistent test: a 5-minute render across four versions of KeyShot using the same scene setup.


KeyShot 2024.3 marked a sharp drop in sample rate, but there’s a caveat: KeyShot 2024.3 got an update to how light is sampled, both for physical lights and HDRIs. Whilst appearing to take longer, you’ll get better results for the same samples, even on images without Denoise. Furthermore, Progressive Denoise - also introduced in 2024.3 - allows KeyShot to produce cleaner, more refined images at lower sample counts too, which offsets the apparent performance loss even more.
Key takeaways:
-
Despite the reduction in samples per second in newer versions, overall fidelity has improved.
-
Sample count is no longer the only metric that matters. In KeyShot 2024.3 and onwards, the new Progressive Denoise and light sampling deliver better image quality with fewer samples, making older performance benchmarks less relevant.
-
For time-limited renders, you’ll get more polished results in 2025 than you would in older versions, even if fewer samples are rendered.
2. Are CPU and GPU samples equivalent?
No. For both studio and interior scenes, CPU samples are more valuable - they resolve more detail than GPU samples. This difference in value is magnified when not using Denoise. Although, this gap narrows to an almost imperceivable point as you climb in samples.
Bottom line: Sample count doesn’t translate identically between CPU and GPU rendering, but both types of rendering can get to an equal result given enough time.

3. How many samples are needed in GPU vs. CPU mode?
Studio scenes with no physical lights or bounce lighting (global illumination), simple plastic materials with 4K textures. Rendered at 4K (KeyShot 2025):
- GPU: Diminished returns after ≈ 100 samples

- CPU: Diminished returns after ≈ 50 samples

Interior scene lit with HDRI, dressed in dark materials with heavy shadows. Rendered at 2K (KeyShot 2025):
- GPU: Diminished returns after ≈ 500 samples

- CPU: Diminished returns after ≈ 100 samples

Interior scene lit with HDRI, dressed in dark materials with heavy shadows. Rendered at 2K (KeyShot 2023):
GPU and CPU: Both peak around 500 samples, with CPU requiring more than KeyShot 2025 due to lack of Progressive Denoising.

GPU renders consistently outpace CPU in render time. For example, a 500-sample interior scene in KeyShot 2025 took 2m 22s on 1 x RTX 3090 GPU, but a staggering 2h 36m on AMD Ryzen 7 3700X 8-Core CPU. Whilst the GPU is a higher calibre and price than the mid-tier CPU, there’s an astronomical difference in rendering time that even the latest Threadripper CPUs couldn’t close.
In summary, CPU tends to hold more per-sample detail, but GPU renders can render many more samples in the same amount of time.
4. How does resolution factor into sample count?
Resolution is just as, if not more important, than sample count. They should be considered together when it comes to optimising your final render output.
It’s no surprise that we found higher resolutions work best, even for basic use, to give Denoise enough data to resolve clean edges and detail. For interior scenes, anything below 2K compromises quality, especially on far away objects - Denoise simply doesn’t have enough pixel data to work with to distinguish what’s noise and what’s detail, resulting in muddy shadows and lost material fidelity.
At low sample counts, especially under 100, the difference between 2K and 4K renders is dramatic.

Of course, you get a sharper image. But you’ve also given the denoiser more data too. As a result, you’re not only getting a higher-fidelity image, but a smoother, better resolved image as a whole.
5. Does Progressive Denoise reduce the need for more samples?
Yes. In simple studio setups, it allowed us to see more detail at low sample rates compared to the old Denoise in KeyShot 2023. In interior scenes, it allowed CPU renders to achieve smooth shadows and detail at lower sample counts - a major benefit for heavier scenes.
We also found Progressive Denoise having a huge impact on animations, reducing flickering and patchiness. This is particularly noticeable in jobs where there’s darker regions or fine textures to resolve.
While Progressive Denoise doesn’t eliminate the need for proper sampling, it shifts the “good enough” threshold lower, helping you get clean, high-quality results faster.
Conclusion
Progressive Denoise delivers meaningful improvements in render clarity, especially at lower sample rates. While CPU and GPU render modes still differ in how they interpret samples, both now offer better output than previous versions. Our recommendation:
-
Render in GPU mode (if possible) for blistering fast results. If you don’t have a compatible GPU, consider that in your next upgrade. We recommend anything equal to or better than an RTX 3080 (e.g. 3090, 4060, 4070, 4080, 4090, 5060 and so on).
-
Upgrade your KeyShot version to at least 2024.3 to benefit from the new light sampling and Progressive Denoise.
-
Render with Denoise on full and let Progressive Denoise work its magic.
-
Prioritise resolution over samples. Denoise is incredibly good when you give it enough data to work with. Consider increasing your resolution and dropping your sample rate. Over the same render time, you’ll likely get better results.
-
For simple product/studio renders, target 4K resolution with 50–100 samples. Increase the amount of samples when using complex materials such as Transparent and Translucent Medium, or extremely fine textures.
- For complex scenes, render no lower than 2K (ideally 4K and above) with 500–750 samples. Again, upping the amount of samples when complex materials with finer detail, especially when they’re further away from the camera.
- Only go >1000 samples for final, high-fidelity renders. You’ll be well past the point of diminishing returns, but it could be worth the extra render time for the best image quality.
By integrating these changes, you can cut render times significantly, reduce unnecessary throwaway test renders, and maintain a high level of output quality, even on tight deadlines.
Let us know how you fare. support@visune.io


